Changes in Lime CRM Server version 12.20
It's now possible to search for information in related objects. If, for instance, a person is connected to the company “Lundalogik”. That person is now part of the result for the query “Lundalogik”.
This is accomplished by adding an attribute, “descriptive”, for one to many relations that includes a descriptive text for the object we're related to.
It is currently not possible to configure what text the descriptive attribute contains. It will take the value of the field that has a field label that matches one of the following in order (if no field with one of these labels are found, the id of the related object will be used).
- name
- firstname
- lastname
- nickname
- description
- customernumber
- companynumber
- key
- primaryemailaddress
- businesstelephonenumber
- mobiletelephonenumber
- jobtitle
- streetaddress
- city
- category
Changes in Lime CRM Server version 12.13
From version 12.13, a large portion of the search module has been rebuilt in this version of Lime CRM. This has three side effects that must be considered when upgrading Lime CRM if the webclient is enabled:
- The index view does not exist anymore. I.e. it is not customizable anymore.
- The search index needs to be rebuilt, if the index view that was used for creating the index renamed any fields. Command to rebuild the index is:
limefu search index -a 'APPLICATION_NAME'
- The search view can no longer include fields from related cards, aliases or concatenated fields. This means that the following syntaxes are no longer supported for the search view:
[Visiting Address[street | zip | city]]
[[parentcompany.name]]
[[salesperson.(firstname, lastname)]]
[name[firstname]]
Example of a search view that is valid:
== title ==
[[name]]
== properties ==
[[visitingcity]]
[[phone]]
[[registrationno]]
== details  ==
The configuration is done in the web client through the T-Pad ++ tool accessible through the menu-button if you are an administrator.
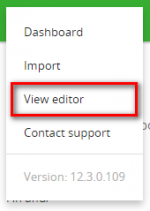
View editor before v. 12.26
All views are administrated through the view editor, which is available for administrators through the menu in the upper left corner of the web client.
In the view editor you enter the type of view you are about to edit (search, card or list) in the left field and the object you want to edit in the right field. By pressing “Get view”, the existing view will be shown in the window.
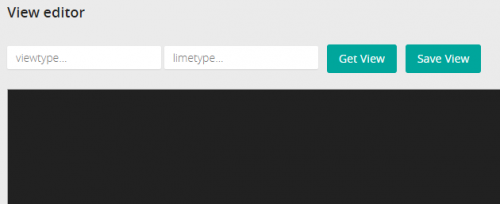
When finished editing the view, you press “Save view”.
Search views
In order to change the search views, you write search and then the name of the limetype (table) you want to configure.
For example, if you want to change the search view for the company limetype, you write search in the left field, company in the right field and press “Get view”. See image below.
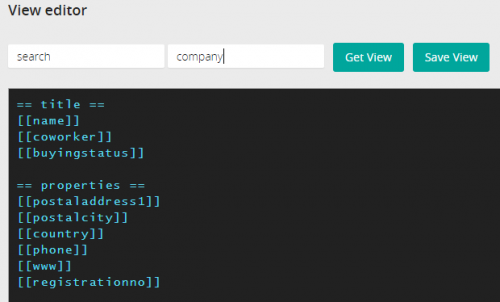
In the window that appears, you write the database name of the fields (in brackets) that you want to show in the search results.
The search view for company, configured as the one above will give the following result when searching, where the fields added after the title section is shown on the first row (and in a larger font size) and the fields added after the properties section are on the second row. Each field is separated through a pipe (|).

Card views
The card view defines the layout of the fields on the object page. The syntax follows the one described above, with addition of separators and related objects.
Separators are defined with ==, for example == Adresses ==.
If you would like to hide a specific field on the card, you can use #. The code below will hide the Phone-field.
#[[phone]]
Related objects are defined through the database name of the related objects underneath the headline === Relation Collections ===.
Note!
Relations to to-dos are excepted from this, and are included automatically if the object has a relation to to-dos.
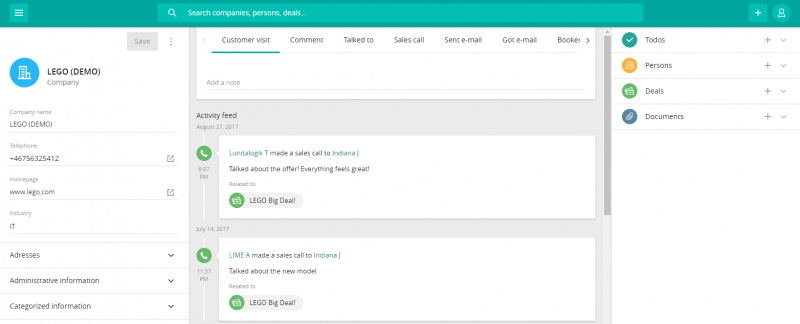
Below is an example of the layout of Company object page.
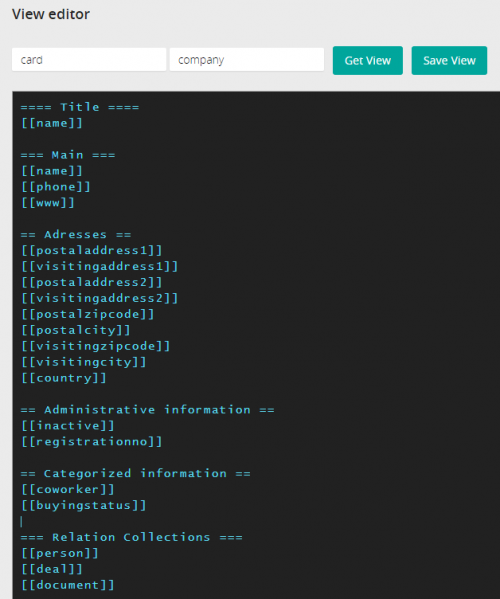
The view above results in the following layout:
Note!
If you are about to hide an object in the web client you need to delete all content in the objects card in the View editor. You also need to delete all content in the search view and all relations to that object in the other cards.
Control specific configuration
Percentage field slider options
Percentage fields are controlled by a slider that can be customized in two ways - with or without steps. When the step option is used, it’s possible to choose the inteval value which the slider will snap to.
The default behaviour without any specified option is to use no steps, meaning that the slider will be able to take every value from 0 - 100.
To use the step option in the probability field we would write:
[[probability]] view(step=20)
This would result in the slider snapping to every 20th value at the slider from 0:
0 - 20 - 40 - 60 - 80 - 100
Read-only controls
From version 12.13 and the introduction of the authorization model in the web client, it's possible to set specific fields as read-only in the web client only. This is done in the card views by adding the syntax below right to the fieldname.
[[fieldname]] view(readonly)
List views
The list views control what information is shown in related object lists, for example what information is shown when pressing the Person-related list on a company object page.
The list views are per default copied from the search views. This means that the exact same information shown in search views are shown in all list views. However, this is configurable by going to the listview for the specific limetype.
The example below illustrates the list view for person.
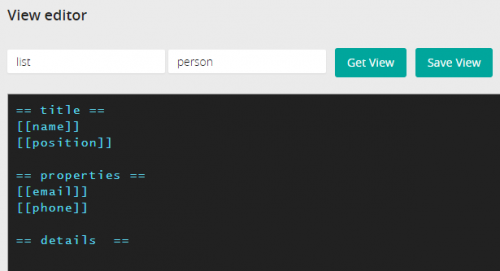
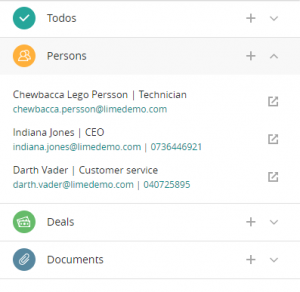
The list view configured as the example above results in the following list view for person:
