Other configuration
Activity types
The different types to choose from when creating a new activity correspond to the history types in the application.
Activity types in activity feed
In order to configure the activity types you go to the “CRM configuration” category, select “Activities” –> “Activity Types” to the left and click “Show code editor” to access the json configuration.

The configuration consist of a number of sections:
- Option key (“comment” in the example above). This is the optionkey for the corresponding history type.
- Localized templates. Under the section “templates” you can specify how the activity should be presented in the activity feed in different languages (english, danish, norwegian, swedish and finish). For each language, separated with the language code according to the example, it's possible to rank the order in how the activity should be presented. It is also possible to use field codes for person and user. This means that _PERSON_ will be changed to the connected persons name in the activity feed, while _USER_ will be changed to the name of the user who created the activity.

The example above means that if the activity is connected to both a USER and a PERSON, the first sentence will show in the activity feed. If the activity only is connected to a USER, the second sentence will be shown in the activity feed, and if the activity isn't connected either a USER or PERSON, the third sentence will be shown.
- Title. This section corresponds to the title when selecting the activity type. The title is localized depending on language.
When finished editing the view, you press “Save view”.
Note!
Please observe that the configuration needs to follow the exact indentation in order to work.
The configuration of activity types according to the example above results in the activity “Customer visit” in the activity feed as the one below in english.

Note!
The order of the activity types are based on the order of the options in the activity type field in LISA.
Attachable object for activities
You can configure what limetypes that should be possible to connect an activity to. Therefore go to the “CRM configuration” category, select “Activities” –> “Attachable Objects” to the left and click “Show code editor” to access the json configuration.

For each row in the list, you write the name of the limetype that should be possible to connect when adding an activity to the activity feed. It is also possible to configure if the limetype should be connected automatically or not using the auto_attach property. If this property is set to true, the object will automatically be set to the parent object for which the current object is connected to. For example, if you add an activity to a deal, and the deal is connected to a company, the activity will be connected to that company if the auto_attach property is set to true.
Creatable Limetypes
In order to configure what limetypes that can be created through the plus icon in the header of the web client you go to the Admin page and from there to the “CRM configuration” category. Select “Limetype Extensions” to the left and click “Show code editor” to access the json configuration. Then set “create”: true for the limetype that you want to be able to create.

In the example above, it is possible to add a new company, but not a new solutionimprovement through the plus sign in the header of the web client.
When you are done - press the “Save” button.
Table order in dropdown menu
To change the order of the tables shown in the dropdown menu next to the plus icon, change the order in the Tables overview in LISA.
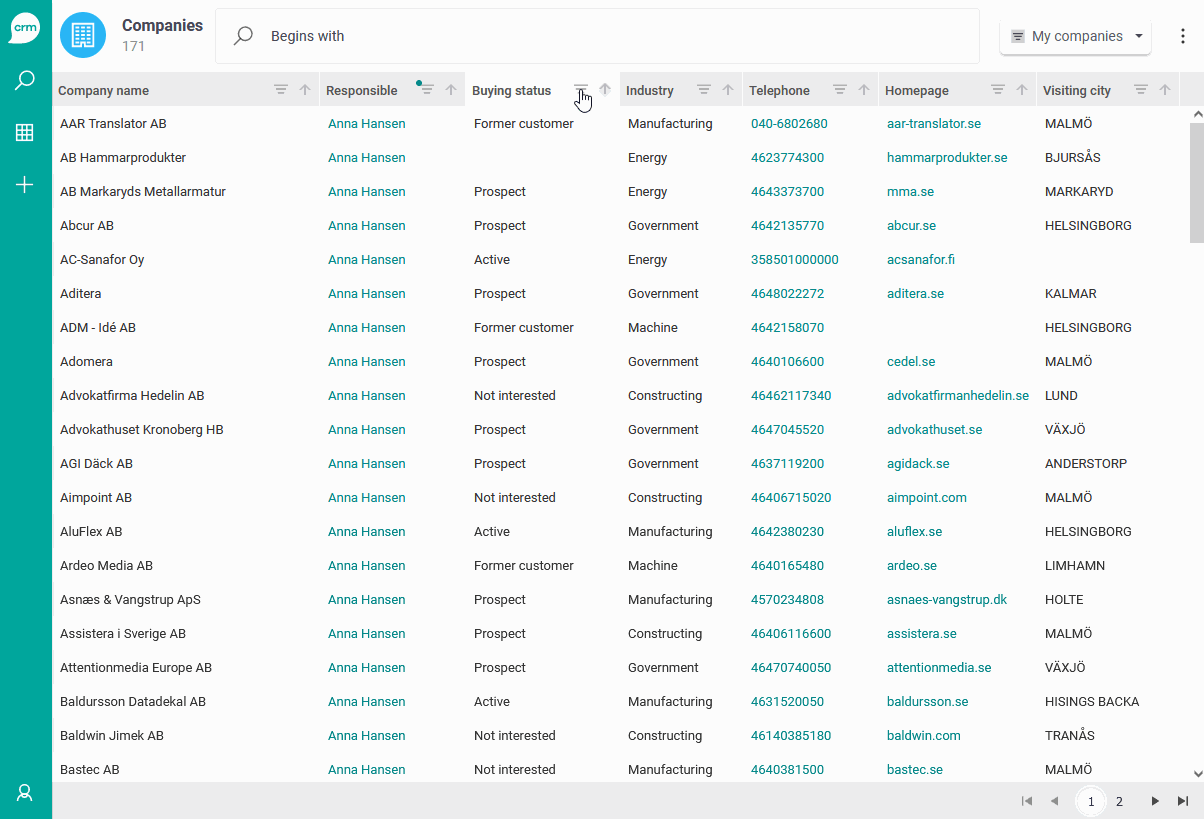
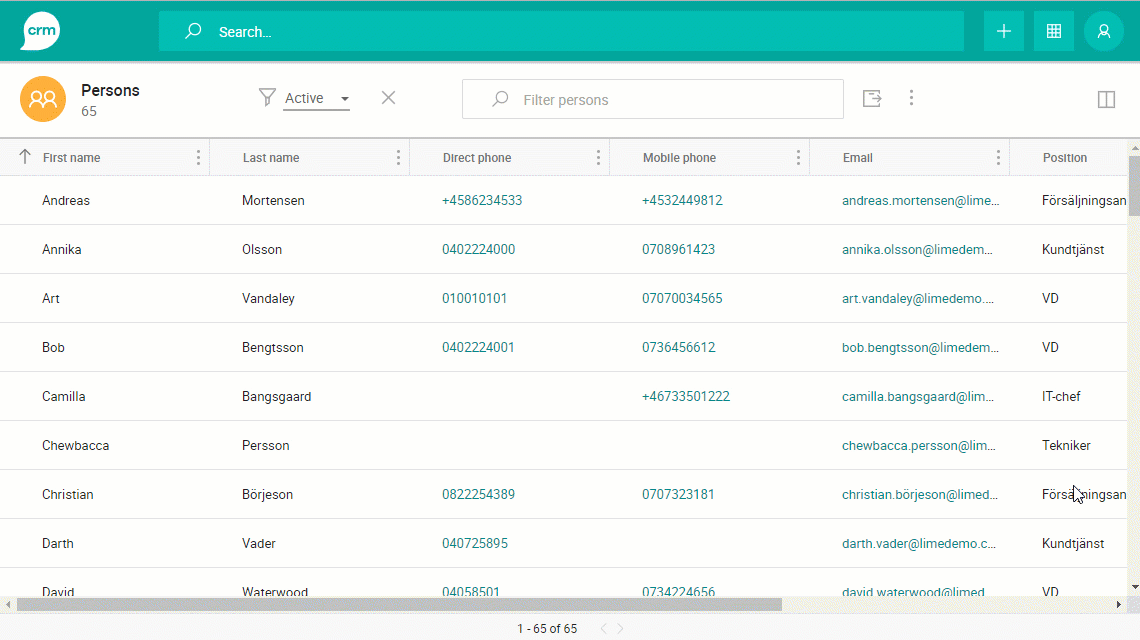
Icons and colors for limetypes
The color and icon for each limetype badge can be configured on the Admin page. Go to Views and select a limetype. Here you can simply click the color picker to select a color, or search for a proper icon and select it using the icon picker.
![]()
The above configuration for the “company” limetype will be visualized in different ways in the Web Client, shown in the pictures below.
![]()
![]()
![]()
Icons
The icon library used for the limetype badges is icons8 - Windows 10 icons.
Note!
We host a very old version of icons8 and it does not include all the icons that you can find via icons8 - Windows 10 icons. Our icon picker in the Admin page will show you those icons that are available. However, you can only search based on filenames in our icon-picker, while on icon8's website you can search for keywords and get better icon suggestions. You must always verify that icons you find on the website are available in our library too.
To find the icon you would like to use, type to search in our icon picker. Or use the Icons 8 search page where you also can search using key words related to each icon.
Note!
If the icon has a dash in the name, for example ringer-volume, the name will be ringer_volume. Dashes on the icons8 webpage corresponds to underscores.
Colors
We strongly recommend you to use the color picker to select a color for limetypes. This helps us having a harmonious UI, and be better prepared when we add support for dark-mode. You can read more about this on our color guidelines.

However, it is still possible to use HEX, HSLA; or RGB color codes in the color picker as well, if you really have to,for example due to a customer request.
Note!
Try avoiding very light colors for limetypes, as they may decrease readability of text in headers in the web client. Always make sure the color that you have selected appears well.
Bulk actions
Bulk create related objects
Note!
Bulk actions documentation is now found in our Platform docs. This documentation only concerns lime-crm version < 2.602.
The bulk creation of related objects is used to quickly create multiple objects at the same time.
Some examples for value creating workflows that this feature enables:
- Save time by quickly connect the right persons to marketing activities
- Easily create to-dos for all deals that lack a next step
You may need to enable the bulk create feature for each table that should have this feature. This is done per limetype in the table view configuration. You find it in Lime Admin under “Views ⇒ <Wanted limetype> ⇒ Table”
Action id: limeobject.bulk-create-dialog
You also need to define which lime type that should be “bulk createable”. Below is an example configuration where you can create participants and todo:s.
Example Parameters:
{
    "relations": [
        "participant",
        "todo"
    ]
}
A configuration of the Person table view, where it is possible to bulk create participants and todos is shown below:
The example configuration will add the action menu to the Person table view:
User workflow
Let's have a look at the general flow by going through the concrete example of adding several persons to a marketing activity:
- Go to the table view of persons.
- Filter everyone who should be included in the marketing activity.
- Select 'Bulk create objects' from the action menu.
- Select marketing activity as type of content.
- Fill out the rest of the form and click 'create'.
- A toast message appears and gives you 5 seconds to undo the action before it creates the corresponding task.
- Another toast message will inform you after the task is completed.
- If the task ended successful you can go to the participant table view and check the result.
Bulk update
From version 2.180.0 (2021-05-31), Lime CRM comes with a bulk update feature. It uses the task service, so please make sure it's up and running as well as monitored (if used on-prem).
How to set up
- Log in to Lime Admin
- Go to Settings (previously Add-ons) –> Bulk update –> Security settings and set the groups that should be allowed to bulk update. For instance Users.
- You may need to enable the bulk update feature for each table that should be exportable. This is done per limetype in the table view configuration. You find it in Lime Admin under “Views ⇒ <Wanted limetype> ⇒ Table”
Action id: limepkg_bulk_update.bulk-update
If you want to configure it using the code editor, it should look something like this:
{
  "actions": [
    {
      "id": "limepkg_bulk_update.bulk-update",
      "params": {
        "exclude": []
      }
    }
  ],
Example where the fields Name and Phone cannot be bulk updated for the company lime type
{
  "actions": [
    {
      "id": "limepkg_bulk_update.bulk-update",
      "params": {
        "exclude": [
          "name",
          "phone"
        ]
      }
    }
  ],
  "columns": [
    {
      "property": "name",
      "isDefault": true
    },
    {
      "property": "coworker",
      "isDefault": true
      ...